1961 Home Transformation: What We Found, Why It Matters, and How to Tackle It (Without Losing Your Cool)
Buying an older home is part archeology, part puzzle, and part love story. You get history, quirks, and character, and you inherit everything time and past projects left behind. This walkthrough hits the high notes from a recent inspection: the roof package unit and evap cooler, structural movement, electrical surprises, plumbing updates, insulation strategy, egress and safety, and plenty of small-but-sharp edges you’ll want to smooth out before move-in.
I’ll lay out what we saw, what’s typical for homes of this era, and the practical next steps to keep the place safe, functional, and comfortable.
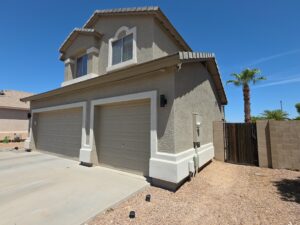
Curbside and Site: Big Saguaro, Busy Bees, and Slab Clues
Saguaro at the Driveway (and a lot of bees)
What we saw: A mature cactus right at the driveway with visible decline at lower sections and heavy bee activity around blossoms. Several arms lean over the drive.
Why it matters: Old or decaying cacti can fail at the base or along weakened arms. With the driveway below, a failure becomes a vehicle and safety hazard. Bee activity is normal during bloom season, but if a hive establishes inside decaying tissue near an entry path, you’ll have a conflict you didn’t ask for.
Common practice: In desert landscaping, keep mature saguaros or large limbs clear of vehicle and pedestrian paths. Assessment by a cactus specialist (yes, that’s a thing) is typical when a specimen leans over areas people use.
Next steps:
Have a desert arborist/cactus specialist assess stability and any internal rot.
If bees have established residence (not just foraging), consult a humane removal service before trimming or relocation.
Prune or brace only under guidance; improper cuts can destabilize the plant.
Buyer tip: This isn’t a “home defect,” but it is a liability and maintenance item. If removal or bracing is recommended, you can request a seller credit.
Roof Deck: Package HVAC + Evaporative Cooler, Seams, and Shortcuts
Roof Package Unit with Gas Furnace (2010) and Tied-In Evap Cooler
What we saw:
Gas package unit from 2010, fins dinged, missing front guard.
Evaporative cooler tied into the same ductwork.
Radiant-barrier-type wrap and mastic smeared over roof ducts; some insulation loose or ineffective.
Old roof penetrations “gooped” closed.
B-vent (water heater) looked short; storm collar with heavy sealant.
Why it matters:
Finned coil guard: Protects the condenser fins from hail and debris. Bent fins reduce airflow and efficiency.
Evap + AC on shared ducts: Common in older desert homes. Without proper backdraft dampers and tight sealing, one system can pull air through the other, hurting performance and indoor comfort.
Ducts on a hot roof: Mastic keeps water out; it doesn’t insulate. Heat-soaked ducts add load to the system.
Short B-vent / loose storm collar: Inadequate vent height or poor flashing increases leak and backdraft risk.
Common practice:
Newer installs use insulated, sealed ducts (R-8 typical) with UV-resistant jacketing, not just roof mastic.
Shared AC/evap setups should include dedicated dampers or motorized shutters to prevent crossflow.
B-vent terminations should follow manufacturer’s listing and current clearances above roofline; storm collars are sealed to the cone flashing, not buried in a gallon of mastic.
Next steps:
Install or replace the condenser guard and comb/straighten fins.
Have an HVAC pro verify proper isolation between evap and AC (backdraft dampers, tight blanks).
Re-insulate exposed ducts with proper exterior-rated insulation jackets; re-seal joints with mastic + UL-listed foil tape, not asphalt.
Have a qualified HVAC/roofer evaluate the water heater B-vent height and re-set the storm collar correctly.
Map and retire unused roof penetrations with proper deck/underlayment repair, not only surface sealant.
Urgency: Moderate. Comfort and efficiency issues now; water intrusion potential grows with time.
Equipment Support and Utilities: Level, Gas Line, and Condensate
What we saw:
Wood shims used to level the package unit because the curb/support isn’t plumb.
Rusted rooftop gas line.
Condensate drain discharging off the roof edge in back.
Why it matters: Units out of level can stress bearings and compromise drainage. A rusted gas line on the roof accelerates with sun and water. Roof-shedding condensate stains fascia and can create slip zones below.
Common practice: Metal stands or curbs set level; coated or CSST-with-bonding gas piping above the roof; condensate to an approved termination (often to grade away from the foundation or to a proper drain receptor).
Next steps:
Re-set or shim with a proper metal curb or stand. Verify pan/drain pitch.
Replace or properly coat/secure the roof gas line; confirm bonding.
Redirect condensate to an appropriate termination that won’t damage finishes or concentrate moisture at the foundation.
Urgency: Moderate. Safety for gas; nuisance for condensate.
Inside: Water Heater Closet, PEX Repipes, and Bonding
What we saw:
Copper supply largely replaced with PEX (red/hot, blue/cold).
Gas piping appeared galvanized in sections with visible pitting.
No bonding jumper on gas piping.
Water heater flue visible through closet; filter access cut directly into return plenum; return grille screwed shut.
Why it matters: Mixed-era plumbing is fine when done right. Pitted galvanized gas piping is a leak risk. Bonding reduces shock risk. Return-side filter slots cut into ductwork can be okay if sealed and gasketed; otherwise they bypass and leak.
Common practice:
Modern repipes use PEX with listed fittings (crimp, clamp, or expansion) and compatible transition fittings to copper/brass.
Gas piping is usually black iron or CSST with proper bonding and drip legs at appliances.
Air filters are typically at the return grille or in a dedicated filter rack—tool-free access is standard.
Next steps:
Have a licensed plumber evaluate/replace deteriorated gas sections and add bonding where required.
Verify PEX transition fittings are listed and not “mix-matched.” Replace any suspect clamps/fittings.
Install a proper filter rack or return grille access; seal any field cuts to prevent bypass.
Urgency: Moderate to High for gas bonding/galvanized sections.
Structure and Concrete: Settlement, Heave, and Drainage
What we saw:
Driveway cracking with depressed panels that pond during rain; cracks run through garage slab and along one side of the house.
Interior floors noticeably out of level on that side.
Distinct heave line in the garage slab; garage door now rubs, doesn’t seal, with daylight at edges.
New water meter; suspicion of past water line leaks contributing to soil moisture and heave.
Why it matters: In slab-on-grade homes, differential movement comes from soil volume changes (moisture), tree roots, plumbing leaks, poor drainage, or old fill. Heave lifts slabs; settlement drops them. Either one telegraphs into doors, trim, and drainage paths.
Common practice:
Manage water: maintain positive grade away from the foundation, control roof/runoff, and fix plumbing leaks fast.
Concrete is allowed to crack; control joints help, but movement beyond hairline plus displacement points to soil/moisture issues.
Next steps:
Have a foundation/structural contractor perform level survey mapping to quantify movement.
Pressure test domestic water supply (and irrigation) to rule out ongoing leaks.
Re-establish drainage: mudjack or replace select driveway panels to restore slope away from garage; re-seal joints.
Adjust/plane garage door or replace threshold after slab issues are addressed.
Urgency: High for leak ruling; Moderate for slab remediation. You want cause controlled before cosmetic fixes.
Buyer tip: Ask for seller to provide documentation of water line repairs, dates, and warranties. Credits for slab and drainage correction are common.
Electrical: From “Creative” to Concerning
What we saw:
DIY drop cord/Romex hack: a cord-and-plug powering Romex through a surface junction box, with jacket damage.
Multiple receptacles testing open ground; some not functioning.
Exposed fan wiring on a flat roof retrofit; aging ceiling fans with wobble.
Attic: suspect Romex splice and junctions; limited access.
Service equipment: very old panel(s), one mounted upside-down (ON is down), colored breakers indicative of obsolete brands, and no grounding. Added subpanel later. Dryer circuit confusion.
Why it matters: Open grounds mean surge and fault paths don’t exist, and connected equipment can become energized. Damaged cords/Romex are a shock and fire risk. Obsolete panels (e.g., Zinsco, Federal Pacific) have documented failure concerns. An upside-down panel faceplate isn’t the main issue—the vintage gear and grounding are.
Common practice:
Receptacles should be grounded or properly GFCI-protected with “No Equipment Ground” labels where retrofit grounding isn’t feasible.
All splices in listed, accessible junction boxes with covers; cords are not a substitute for fixed wiring.
Modern service includes a single service disconnect, grounded/ bonded correctly, with AFCI/GFCI protection by location.
Next steps:
Full evaluation by a licensed electrician. Plan for:
Replacing obsolete service equipment with a modern, properly grounded main panel with a single service disconnect.
Correcting open grounds (rewire, GFCI retrofits with labels, or new grounding where permissible).
Removing the cord/Romex setup; rewire circuits properly.
Verify bonding of gas and water piping, add if missing.
Address fan support and concealed wiring methods for flat roof ceilings (fan-rated boxes, concealed cable or EMT).
Urgency: High. This is a safety and reliability bucket. Budget accordingly.
Buyer tip: Get two licensed-electrician bids. If the seller won’t replace panels, a reasonable credit for a full service upgrade is common in homes of this era.
Life Safety: Egress, Alarms, and Hot Water Temp
What we saw:
Bedroom window sills at ~57″ above the floor.
Missing smoke and CO detectors.
Domestic hot water measured ~140°F at fixtures.
Why it matters: Modern standards expect emergency egress (operable windows with lower sill heights) to aid escape and firefighter access. Alarms save lives. 140°F scalds skin quickly, especially for kids and older adults.
Common practice:
New bedrooms require compliant egress windows or exterior door egress. Older homes are often “legal non-conforming,” but upgrades are strongly recommended during remodels.
Smoke alarms in each bedroom, outside sleeping rooms, and on each level; CO alarms where fuel-burning equipment is present.
Water heater temps typically set around 120°F at fixtures.
Next steps:
Install smoke and CO alarms immediately.
Lower water heater setpoint to ~120°F; verify with a thermometer at the tap.
Plan longer-term egress upgrades during window replacement projects (tempered/egress units at bedrooms).
Urgency: High for alarms and hot water setting (easy wins). Planned for egress.
Ventilation and Bath Exhaust
What we saw: A very clogged, ineffective bathroom exhaust vent; shower/faucet trim loose with excessive play at the valve; fan noise elsewhere.
Why it matters: Poor bath ventilation drives humidity into walls and attic cavities, feeding mold and wrecking finishes. A wobbly valve can stress piping and crack soldered or crimped joints behind the wall over time.
Common practice:
Ducted bath fans, smooth-wall or approved flex runs, exterior termination with backdraft damper.
Valve bodies braced solidly to framing, trim snug, escutcheon sealed to the wall.
Next steps:
Clean or replace the bath fan; verify a proper, short, smooth exhaust route to the exterior.
Open the shower valve wall (if needed) to add a proper support block and ensure tight connections; re-seal trim.
Urgency: Moderate. Address before repainting or tile work.
Insulation, Thermal Imaging, and Comfort
What we saw with thermal camera:
Strong “striping” at roof framing (thermal bridging).
Warm fields between members suggesting insulation is on the roof deck/rafters (radiant-barrier approach) rather than on the attic floor—plus obvious gaps.
Single-pane windows typical of the era.
Brick original structure with wood-framed addition; the addition has low siding-to-grade clearance.
Why it matters:
Insulating the roof deck can work, but it must be continuous and detailed (and the attic often becomes a semi-conditioned space). Gaps defeat the plan, raising attic humidity and heat load.
Thermal bridging means the wood members become heat highways into the home.
Single-pane windows leak heat; comfort suffers.
Low siding clearances invite subterranean termites straight into the walls.
Common practice:
For vented attics, insulation on the attic floor (e.g., blown cellulose/fiberglass) with baffles at eaves and good air sealing at ceiling penetrations.
For unvented/conditioned attics, continuous insulation at the roof deck (often spray foam) with dedicated details.
6–8 inches minimum siding clearance above grade in termite country; visible foundation where possible.
Next steps:
Decide your attic strategy: either commit to a proper unvented/roof-deck insulated assembly or revert to a conventional vented attic with insulation at the floor. Half-measures cause hot rooms and condensation.
Add air sealing around penetrations, top plates, and attic hatches.
Plan for window upgrades during future remodels—but start with shading and weather-stripping for immediate comfort gains.
At the addition, raise grade or trim siding to restore clearance; add a continuous termite inspection gap.
Urgency: Planned. Comfort and energy bills improve when this is done right.
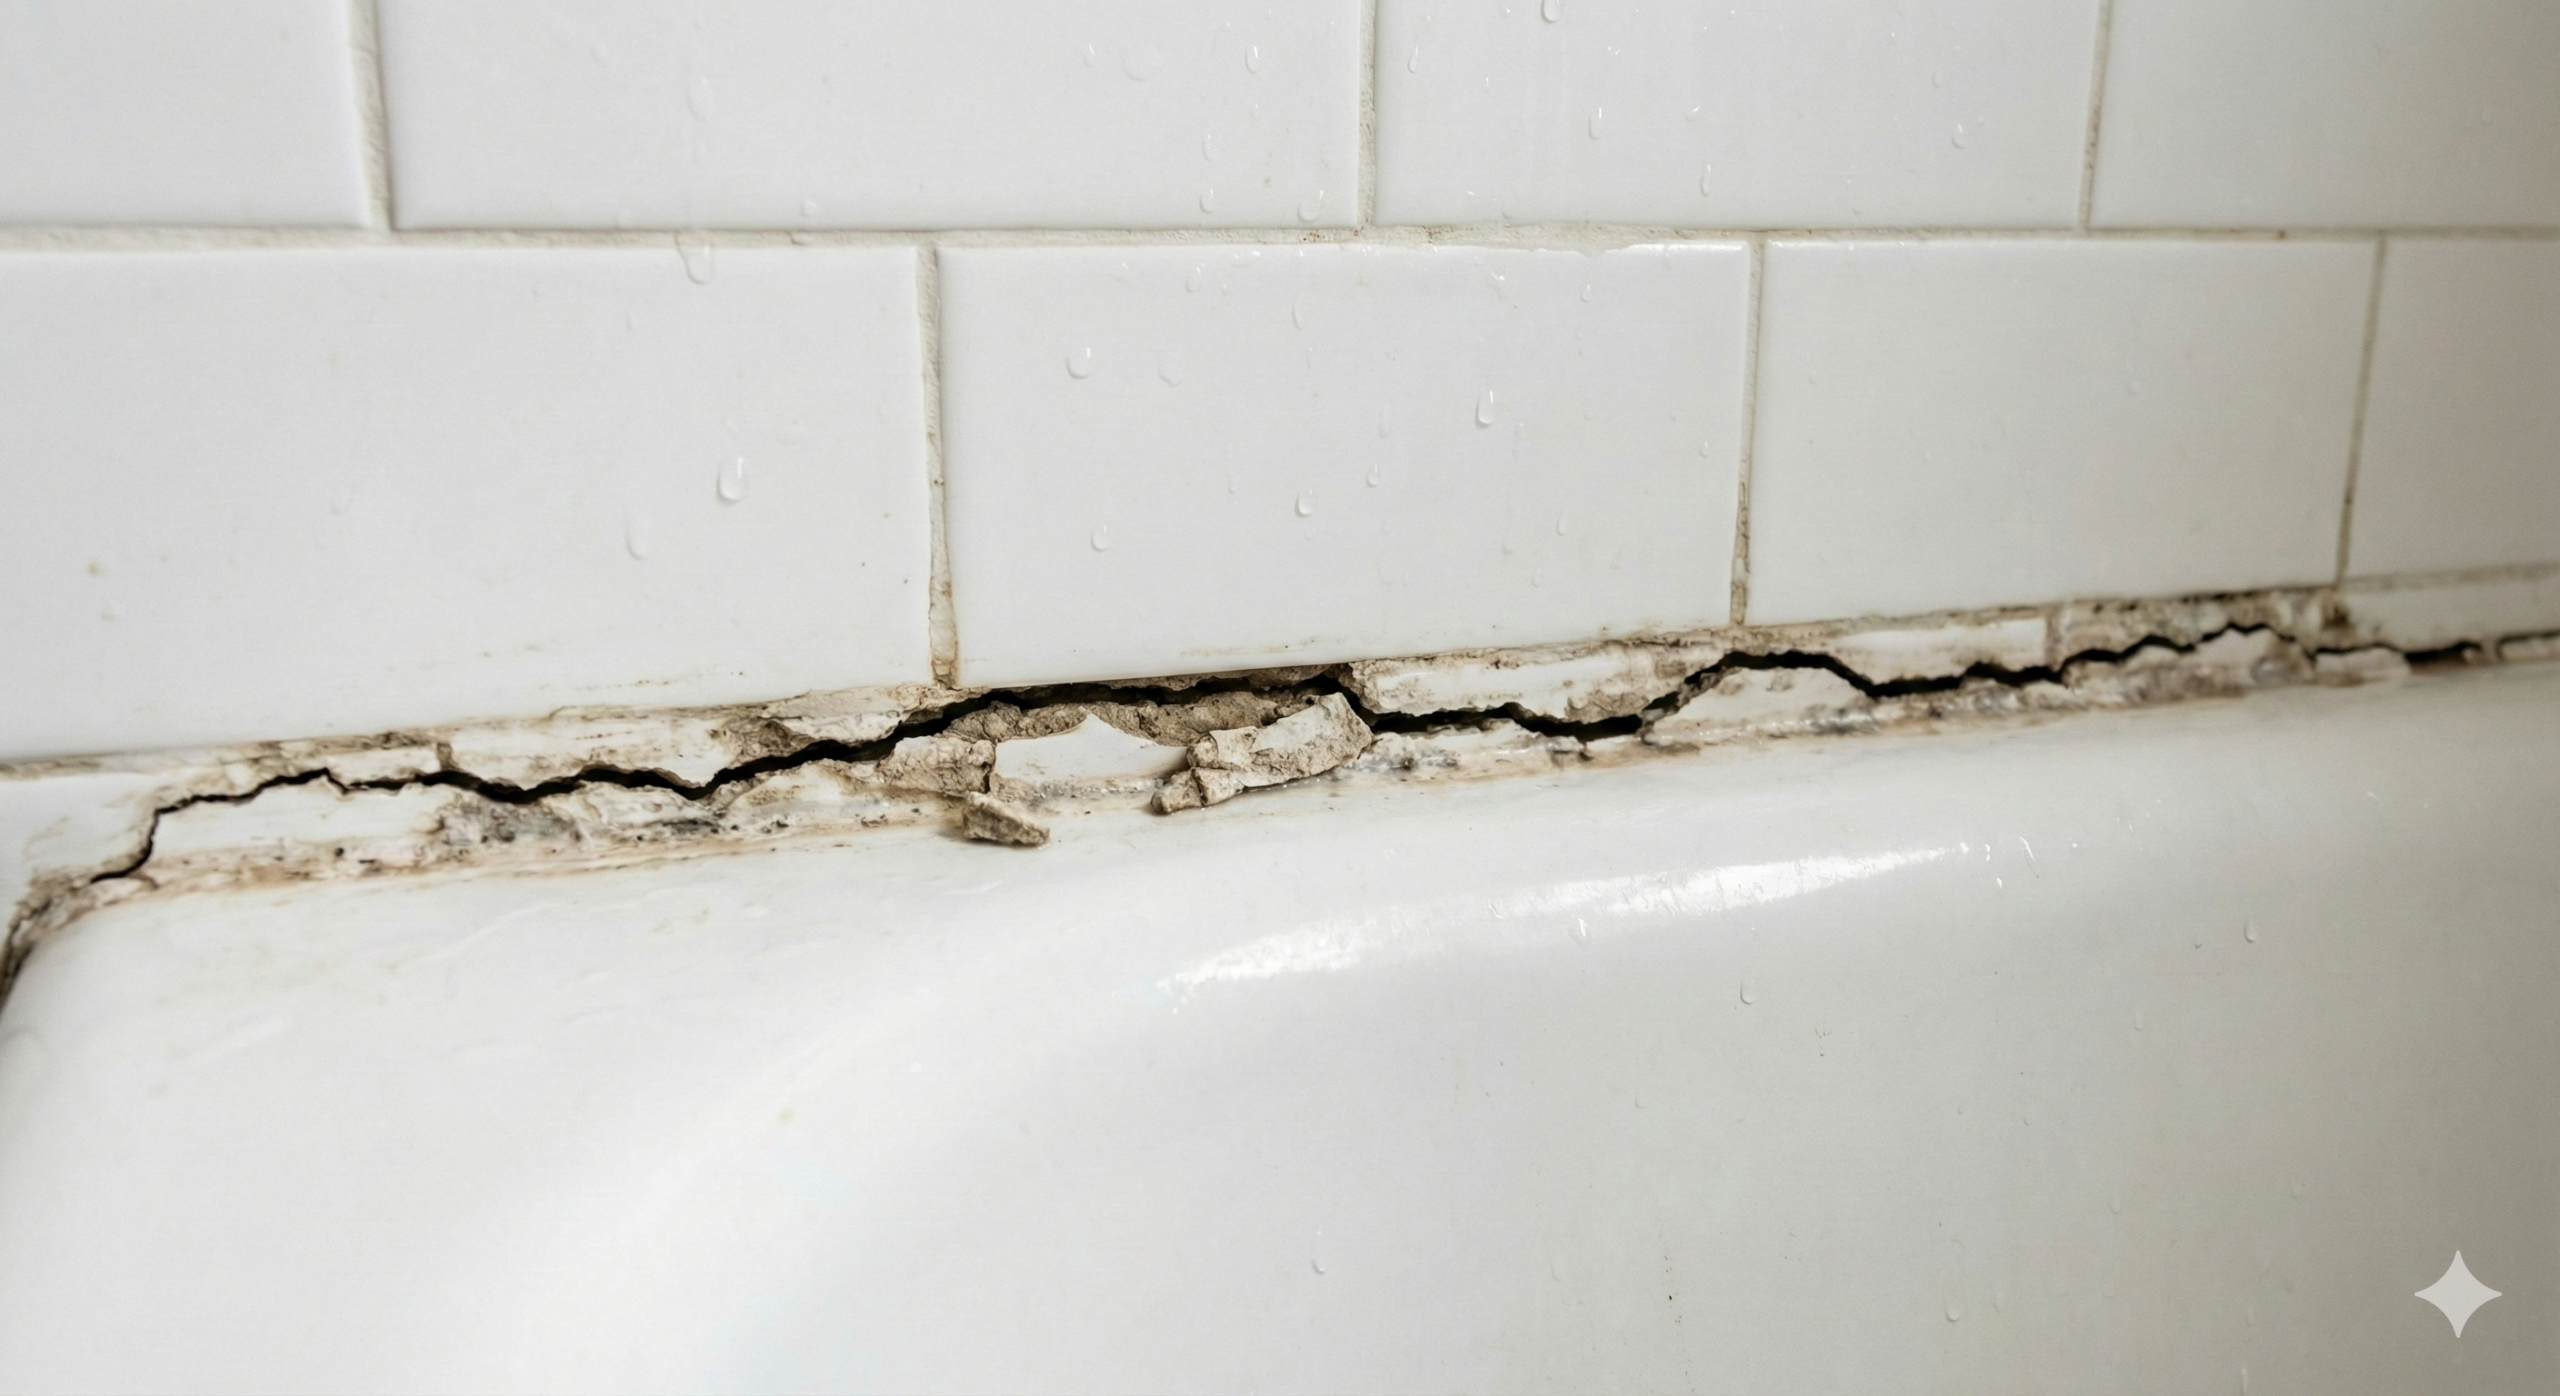
Termites: Tubes Behind Kitchen Access
What we saw: Painted-shut access panel behind the kitchen sink/dishwasher area. Once we peeked, we found termite tubes and prior moisture staining.
Why it matters: Termites track moisture. Old tubes can be inactive, but the moisture staining suggests a history of leaks—the kind termites love.
Common practice:
Maintain accessible plumbing panels (don’t paint them shut).
Annual termite inspections in high-activity regions; treat when active tubes or wood damage is present.
Next steps:
Engage a licensed termite company for a full inspection and treatment plan (soil treatment, foam, or bait as appropriate).
Fix any active leaks and dry the cavity thoroughly.
Keep the access panel functional for future checks.
Urgency: High for inspection; Moderate for treatment depending on findings.
Kitchen and Interior Finishes: Cabinets, Flooring Gaps, and Vintage Appliances
What we saw:
Loose wall cabinets that visibly sag.
Flooring updated thinner than original; long, consistent base/trim gaps in halls.
Vintage oven functions, but sounds rough; interior light out.
Mystery cabinet slot (vintage feature—often a breadboard slot or mail/bill organizer in mid-century cabinetry).
Why it matters: Sagging cabinets can pull anchors out of old plaster/block. Gaps are cosmetic but collect dust and look unfinished.
Common practice:
Cabinet rails or ledger strips into studs/block with sleeve anchors; modern fasteners, not just wood screws into plaster.
After thinner flooring installs, shoe molding or new base trim closes the gap.
Next steps:
Re-hang or re-anchor loose cabinets using appropriate anchors for block or wood framing.
Add shoe/base to close gaps after confirming there’s no underlying movement needing attention first.
Service the oven or budget for replacement if noise persists.
Urgency: Low to Moderate. Safety first on the cabinets.
Exterior Addition: Siding Clearance and Materials
What we saw:
Addition framed in wood (hollow sound vs. solid block), with inadequate clearance from siding to soil.
Why it matters: Low clearance = concealed pathways for termites and chronic moisture wicking into sheathing.
Common practice:
Maintain 6–8 inches of clearance to soil, 2 inches to hardscapes. Flash bottoms, consider metal termite shields at transitions.
Next steps:
Lower grade or trim siding and add proper flashing/drip details.
Maintain a visible inspection gap around the perimeter.
Urgency: Moderate. Pair with termite plan.
Laundry, Drains, and Oddities
What we saw:
A pipe from the laundry room terminating under/through a walkway—exposed and susceptible to damage.
Series of holes drilled above the garage door header (likely a past attempt to relieve trapped water or dry a wet cavity).
Cleanouts at rear going to the alley (typical in older areas with alley utilities).
Why it matters: Exposed or unprotected drain/condensate/laundry lines get broken by foot traffic or sun. If the garage header once trapped water, you’ll want to ensure the original leak source is fixed and the framing is sound.
Common practice:
Protected terminations, buried or sleeved where they cross walkways.
Proper flashing and weeps for any exterior header cavities.
Next steps:
Relocate or hard-protect the laundry discharge/condensate lines.
Have a contractor probe/scan the garage header area; if moisture damage remains, repair and seal properly.
Keep rear cleanouts accessible and capped.
Urgency: Low to Moderate. Preventative work.
Evaporative Cooler Controls and AC Heat Gain
What we saw:
Interior cooler controls and dedicated supply lines.
Noted heat gain along exterior AC wall areas and around penetration points.
Why it matters: Evap coolers help in dry seasons but increase dust and require pad/water management. Any unsealed penetrations or poorly insulated wall chases around the AC can add heat right where you’re trying to cool.
Common practice:
Seasonal shutoff and drain for evap systems; damper closures when AC is in use.
Seal wall penetrations with fire-rated or exterior-rated sealants as appropriate; insulate chases.
Next steps:
Service the evap cooler (pads, pump, distribution, damper). Close/seal the cooler path when using AC.
Air-seal and insulate around AC penetrations.
Urgency: Low to Moderate. Comfort and cleanliness.
The Electrical Panels: Replacement Roadmap
What we saw:
Very old service equipment; subpanel added later; some labeling reversed by panel orientation; colored breakers suggest obsolete brands; no grounding electrode system evident.
Why it matters: Reliability and safety. Many buyers choose to modernize on day one.
Replacement plan (typical scope):
Service upgrade to a modern main panel (commonly 150–200A depending on load calc) with a single service disconnect.
New grounding (ground rods/UFER, water/gas bonding).
Rework feeders to any subpanels, correct neutrals/grounds separation.
Add AFCI/GFCI protection per current standards as circuits are re-worked.
Labeling, permits, inspection.
Timeline: 1–2 days on site once scheduled, plus utility coordination.
Budget: Obtain two local bids; expect a notable line item but a strong resale and safety payoff.
Priorities at a Glance (What to Tackle Before Closing vs. After)
Do Before Closing (or negotiate credits)
Electrical safety: Panel replacement plan, open grounds, DIY wiring removal, bonding.
Active leaks check: Pressure test water supply/irrigation; verify the new meter reading behavior.
Termite inspection: Full WDI report and treatment proposal if active.
Smoke/CO alarms: Install immediately (easy, inexpensive).
Water heater temp: Turn down to ~120°F (same day fix).
First 90 Days After Closing
Roof system tune-up: Condenser guard, duct re-insulation/sealing, verify evap/AC isolation, B-vent height/storm collar.
Drainage & slab: Panel replacements/mudjacking or panel replacement at driveway; adjust garage door after corrections.
Siding clearance at addition: Restore termite inspection gap.
Bath ventilation & valve support: Replace/clean fan; secure shower valve.
Long-Range Comfort Upgrades
Insulation strategy: Choose vented attic with floor insulation or unvented conditioned attic and do it right.
Windows: When budget allows, replace single-pane with efficient units meeting egress needs in bedrooms.
Cabinet anchoring & trim: Re-secure cabinets; add shoe/base to close gaps.
Saguaro management: Safety pruning, monitoring, or relocation if advised.
A Few Building-Era Realities (So You Don’t Fight the House)
High bedroom sills (57″) were common in early 60s construction and predate modern egress requirements. Not “wrong” for the year, but worth upgrading.
Block homes hold temperature well; the wood-framed addition won’t, unless you nail the insulation and air sealing.
Evap + AC combos are a regional classic. They can coexist, but only with proper dampers and sealing.
Obsolete panels linger for decades. Replacing them isn’t flashy, but it’s one of the best investments you’ll make.
What This Means for a Buyer
You’ve got a solid, character-rich home with two worlds stitched together: durable original masonry and a later wood addition. The risk picture is clear and manageable: electrical modernization, confirm no active plumbing leaks feeding soil movement, termite diligence, and a smarter insulation/ventilation plan. None of this is mysterious. It’s a sequence.
If you’re negotiating, focus on electrical, termites, and drainage/slab measures. If you’re planning, line up HVAC/roof duct fixes and bath ventilation early. Keep an eye on that saguaro before it keeps an eye on your fender.
Breathe. The house has been standing since 1961. With a few right-sized moves, it’ll treat you well for the next chapter too.
 Hi, I’m Home Inspector Dan — owner of Property Inspections Plus and a